Showing posts with label Straight Stitch. Show all posts

Tuesday, 23 January 2018

All Buttoned Up!

Here are some more examples of our work with buttons during a workshop created by Sue Bennet of the Lytham St Annes Branch of the Embroiderers Guild. See the post here.

Lazy Daisy stitches over buttons, above and Straight stitches in pale blue thread look effective over blue buttons below.


More Lazy Daisy stitches above, with Straight stitch bars in orange thread, and below in variegated lilac thread the stitcher has worked Spiders Web.
Fresh green and peach coloured buttons look lovely with Pistil and Straight stitches in white Perle and the centre looks like the beginnings of a Spiders Web is being worked, below.

Above, this colourful Jungle print fabric is going to adorn a new 'play room' for this lucky stitcher. Various coloured threads used to Needle Weave and am loving the look of weaving over half a button. Buttonholed Bars are lying across the pale blue button upper right, like a starfish :-)
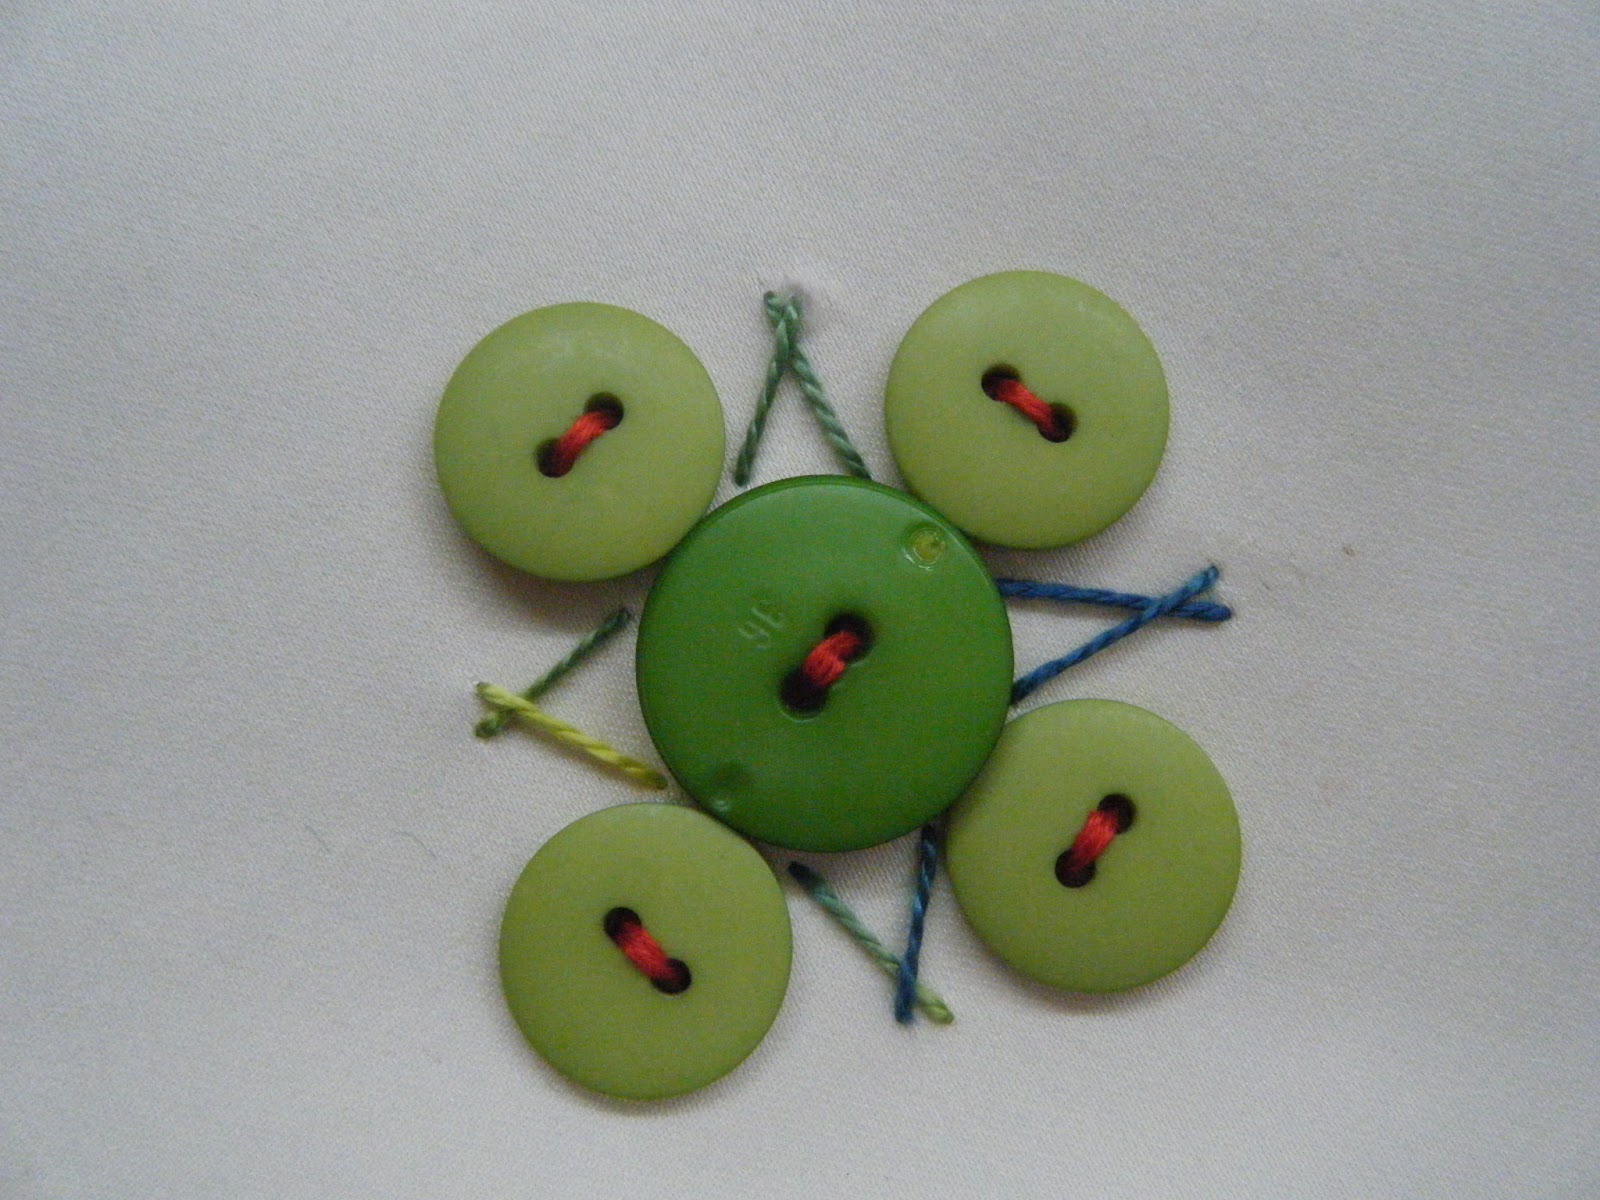
A is for........ Pistil stitches decorate the buttons in this monogram, above and lime green, white and yellow buttons make a spring time colourway with this Straight stitched piece, below.

More Spiders Web weaves its way around this grey button on brown background fabric, above. Am told that the bright, warm coloured design owes itself to a 'happy accident' as the stitcher ran out of thread. Love those moments!
What a good idea to use a striking vivid green thread for the 'spokes' and then to Needle Weave in different coloured thread around them? The grey background fabric is very contemporary and popular right now with the modern quilters designers.

Another great idea, above, using Straight stitches to connect to the buttons that encircle the central button topped with a sparkly pink one. Wrapping the outer buttons makes for a sumptuous look. Can't wait to see this one when its finished :-)
Below, is another luxurious looking design. One large black button looks regal with lime Needle Weaving and finished with wine coloured beads. A patterned background fabric adds to the overall effect.


These two samplers, above and below, are a fun way to try out all the various stitches on Sue's Worksheet. Straight, Pistil, Lazy Daisy and Needle Weaving Stitches are all used.

Our last photo is one that was 'done earlier' by an experienced stitcher who couldn't wait for the Workshop to have a go with her own button design. This lovely Flower Basket was worked by Barbara B on to black felt and framed by coloured card. 
Notice how Barbara has used the same coloured buttons and threads to give the impression of different flowers. Are the lilac buttons with yellow centres Forget-me-Knots?
Thank you to all our members for allowing their work to be photographed for these two posts and many thanks also to
Sue Bennet for all her hard work in coming up with the ideas, samples and worksheets for our 'Button' Workshop.
We all had a great time stitching, chatting and jazzing up our buttons. There are sure to be many more 'buttoned up' designs coming in the future.

Imagine a Button.....

How lovely it is to be writing the first post of another New Year. Seems that 2018 is well under way now and we at the Lytham St Annes Embroiderers Guild kicked off our first meeting of the year with a workshop led by Sue Bennet who taught us some very  imaginative ways to sew a button on.
Here are two of Sue's samples to whet your appetite. 
 A floral button tribute using Lazy Daisy stitch and Stem Stitch which would be easy enough for a beginner to do. Beads decorate the centres.
Below, using buttons to make your own Monogram. This time with Pistil Stitches and French Knots.
The designs got gradually more complex using stitches for the more experienced embroiderers.
If you would like to learn more, Sue is happy to discuss teaching your group; so get in touch by the usual Embroiderers Guild channels or come and see us at the address on the left side bar. You are sure to have fun and learn new ways with buttons and stitches.
Here are our group efforts - most are still WIPs but the following photos will show you what we were up to :-)
Above, white buttons decorated with green Pistil stitches and yellow French Knots reminds one of daisies, and below; in white Lazy Daisy and Pistils with Spiders Web in blue. 

Here buttons will be arranged around a central button decorated with pink pistils and a similar floral/circular arrangement below using Lazy Daisy.
Lazy Daisy stitches in a yellow thread looks effective, below.


Another floral arrangement, above, this time using straight stitches.
Getting a little more complex, below, is Spiders Web ( over one spoke back and under two forward each time) in lilac over the centre of the button with needle weaving under and over the thread 'spokes' that fan out in different lengths from the button.
Using a patterned fabric also adds interest.


Straight stitches can look satisfyingly complex, above and below. Using pretty shaped buttons also gives the illusion of a complicated stitch and is a good idea if you are a beginner.


Add beads for extra ooomph.... or use coloured and variegated threads in complimentary or contrasting colours to the buttons for a fun look.

Or go big and mash it up with different coloured threads and beads on a colourful background (green fabric more vivid in real life!) as below using Pistils and Spiders Web.


That is all for this post. Hope you enjoyed spotting your work - if not it will be in the one following.
Many thanks to Sue for coming up with some great ideas, providing beautifully executed examples to spark our imagination and providing a detailed Worksheet explaining the various stitches we could used on our own buttoned pieces. 
We won't be able to look at a button in quite the same way again :-)
If you fancy a go yourself, have a rummage through your button box and grab some thread ( Perle No 8 was used as its not too thick and less likely to split going over the buttons as a stranded embroidery floss) then let your imagination take over.
Or call in on us at our next meeting (details on right side bar) and ask for a worksheet.


Saturday, 15 October 2016

Make Mountains with Your Sewing Machine

As promised in the previous post on Free Machine Embroidery here are a few snaps of the lesson on 'drawing' mountains and hills with your sewing machine.
Feed dogs down, attach the Darning (aka Hopper) foot, place your fabric backed with Iron-on-Vilene under the foot, foot down and away we go! 
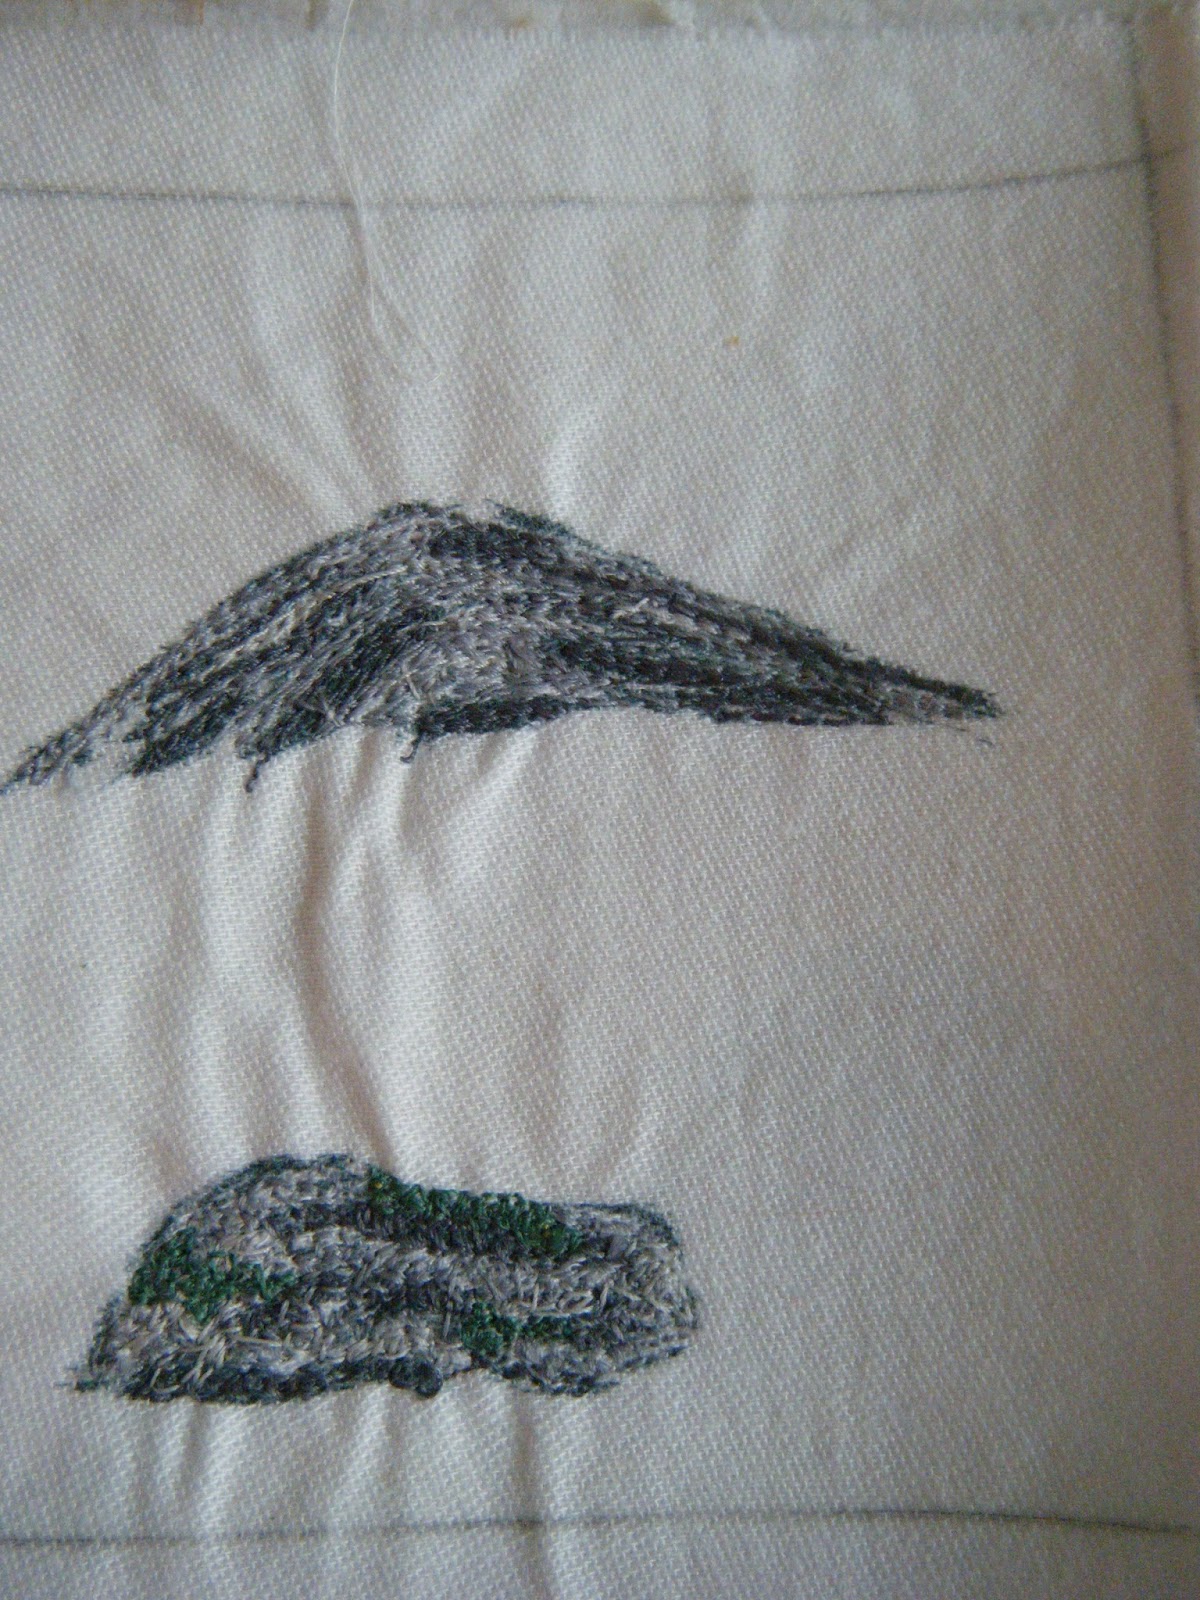
 Here is our Tutor, Sue Bennet's Sample Mountain above. Firstly, colour a background with Watercolour or soft leaded pencils or crayons in greys, greens and browns; then using Straight Stitch start to 'shade' in the slopes with the darkest colour first and adding the lighter coloured threads after to form Snow or Glaciers.
Remember to tilt your work in the direction of the slopes!
 Dark looming mountains awaiting their snowy sides, above. Equally you could use this technique to form lava flowing down a volcano. Love the verdant greens of the hills in the foreground.

Tip - when covering your fabric with dense stitching it is a good idea to bring your bottom/bobbin thread; up to the top of your work. To do this simply lower your needle into the work and bring it back up again, catching the bobbin thread with a pair of tweezers. (computerised sewing machines have a needle up/down facility. Simply press the button once to take the needle down and again to raise it. It will bring the bobbin thread up with it). 
Hold onto both threads and sew a few stitches in the same place to secure them. Snip off. 
This is a good practise as it prevents the threads from tangling and snarling at the back of your work. 
Quilters often do this when quilting on a home sewing machine and will use an open eyed/self-threading needle to take the thread to the back of the work once finished, where they will knot the threads the take them into the wadding to hide them. (needle is brought out again onto back and thread pulled taught before snipping. Pulling it taught allows the thread ends to bounce back into the wadding layer and are therefore hidden). This makes for much neater work that is also more secure - no unravelling thread with this method.
 Just starting to stitch the darker parts of the slopes here. Browns can also be used not just greys (N.B. Black is a little too harsh for peaks that are in the distance).


 Another sample from Sue, above. Lovely green hills. Remember to make your hills or mountains different shapes as they would be in Nature.
Below are some more hills of Sue's in various shades of grey thread. One also has some green added - this could depict the moss on rocks, for example.


Well, that is just a little taster of what you can do with a little imagination, a Darning Foot and dropping your Feed Dogs. Not forgetting a really great Teacher! Thank you Sue.
Next up - free machined Trees.

Friday, 14 October 2016

Free Machine Embroidery

Two days ago 15 or so members of the Lytham St Annes Embroiderers Guild got together for a 6th Lesson in Free Machine Embroidery (aka free motion embroidery) where an ordinary sewing machine is used to create embroidery designs.
We met up at a local church which is a very pleasant and inspirational place to work in, not just because of the light streaming in through the windows but also due to the many colourful 'banners' or quilted posters hung all around the walls. 

Here are a couple of pics showing us at work - you don't usually get to see us as we are a little camera shy and this blog is to showcase our work and activities but these came out very well, so here goes.

Sewing makes us happy :-)


There have been several groups since that first one back in 2013; who have benefited from the knowledge and expertise of our talented long time member, Sue Bennet who devised 5 Lessons on Free Machine Embroidery. Now due to popular demand she has created a 6th Lesson to teach us how to 'draw' grass, trees, mountains and other features of a landscape; using an ordinary domestic sewing machine.
Dropping the Feed Dogs (the teeth that hold onto the fabric and help push it through the machine) and adding a Darning Foot (aka a 'hopper' foot - so called due to the hopping up and down motion it makes as you sew) allows you to move the fabric freely where you wish - hence the term 'free motion' or 'free machine'. This is also the technique used for Quilting by domestic machine.
Dividing a 12 inch square of light/plain fabric backed by Iron on Vilene to strengthen it; into 9 individual 3 1/2 inch squares
 ( separated by a 1/4 inch gap) allowed us to practise free machining different elements of a landscape to give us the confidence to create a whole picture at a future time.
Here is a quick peek at Lesson 6.

 This is our Tutor, Sue Bennet's example, above. There was quite a lot to learn and some of us got really involved trying to finish our mini landscapes which were quite labour intensive, especially the mountains (middle, top row) so most of us only did the first 3 parts. This means that poor Sue will have to set up another lesson for us! but we are looking forward to it - thank you Sue! :-) 
In order to keep each post to a decent length, this one will only feature the first mini-lesson where we learnt how to sew grass and corn.
First we added colour to the fabric using watercolour pencils. These are softer than ordinary colouring pencils and have more pigment in them. There is also the option of laying down a little colour onto paper or a palette/plate or saucer and adding water to it for a more subtle colour ( or if using Inktense Pencils adding water will enhance the colour. So beware if you have these type of pencils or blocks as the colour is really very bright and Intense (hence the name).
Grass needs to be coloured horizontally and corn is vertical to follow the natural growth pattern.

This is the example Sue sewed for us as we watched and then tried to copy.
Though the description here may describe what to do, its actually seeing the motion you need to make whilst moving your fabric under the needle and advice on the stitches to use and their length that is invaluable; so if you are having trouble and/or fancy learning this useful skill, do get in touch with us (details of our meetings etc on the right side bar) and book some lessons with Sue. She is also currently teaching the Preston Embroiderers Guild Group.
Below are a few of our efforts.
 The effect depends on how much you pull the fabric whilst sewing. In this sample above, the zig zagged grass is stretched out but in the one below it is closer together. The machinist has also changed the length of the zig zag  to give different heights of grasses.
 You can use different stitch widths and lengths to alter the appearance and try using several colours of thread. Colouring the background in several greens also added to the effect.
Corn comes in several shades too, so change the top thread now and again! Also remember nature does not grow straight up but bends and sways with the wind and grows at different rates.Here we used Straight Stitch for the corn stems and Zig Zag for the corn ears.
Look at images from magazines or books for inspiration but nothing beats having your own images, so don't forget to use the camera on your phone when you are out and about. You will find that you never look at fields in quite the same way again :-)
One last thing to bear in mind is the type of fabric you use and the vilene. You may have noticed some puckering in one or two examples shown above - this is due to the build up of stitches on the ordinary cotton fabric which is not quite up to the job. You will need to back your fabric with Medium Weight Iron-on-Vilene in every case but if you are going to cover the whole piece and work intensely on it Calico is a better option. Some also swear by Cotton Sateen which unlike calico is white and has a lovely sheen and feel to it (FYI the sheen is not too noticeable so won't interfere with the effects you are trying to make).
That's all for this post - look out for the next one showing how to stitch mountains.
Many thanks to Sue B for all her hard work, patience and enthusiasm, not just in this workshop but behind the scenes with all the lessons she has invented, planned and executed over the last 4 years. You are amazing Sue and we are so very grateful and glad to have you in our group!