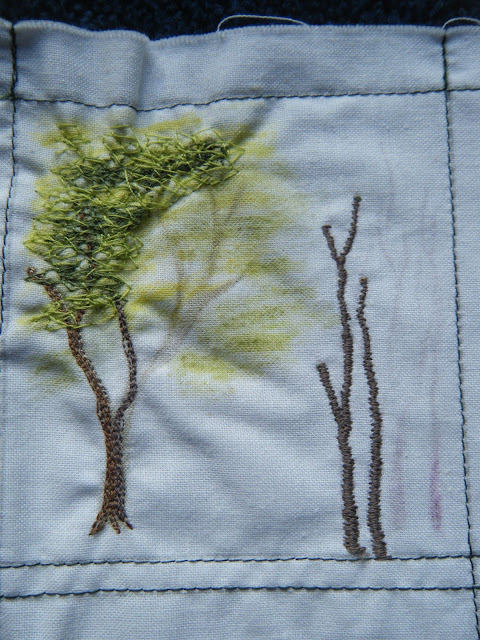
If you have read the last two posts you will know that we have been learning to 'draw' with our sewing machines. For a quick idea of how to go about this, click the links here and here.
There are also some good videos out there on You Tube (too many to start putting links here though...) but the best way to learn is to come along to one of our classes with Sue Bennet (see the side bar on the right for contact info).
We did have 9 different features of Landscape to learn but we only got so far as the third which were Trees.
Here are a couple of ways to sew them as created by Sue.
Firstly, use coloured pencils with a soft lead to sketch in some trunks to use as a guide a you sew.
Tip.
Using colouring pencil or crayon to make a background really helps with keeping to your design - this is such an engrossing technique that you actually 'lose track' whilst you sew; so having some kind of guide line really helps you keep to that shape. Of course, don't worry if you go outside the colour its just a rough guide. It doesn't need to be exact and actually looks more realistic if there are a few wobbly bits.
Go over this with horizontal strokes in yellow and green to help you place the leaves.
Work trunks first in straight stitch following the direction of the trunk and branches. Decide which side will be in the shade and sew this in darker threads.
Trunks in the distance are not as wide. Work in zig-zag altering the width to a narrower setting as you sew towards the top of each trunk or branch.
A close up with more stitching (leaves) added - above. Sew leaves using a small width zig-zag in a circular motion. Sue gave us advice on the actual widths to try out.Practise makes Perfect! The more you try out different designs and grow in confidence the better able you will feel to add more detail such as some grass and pretty flowers around the tree trunks (this example was Sue's by the way).
A lovely example by one of our members above. It could be a Cedar ( to my untutored eyes, anyway!). Lovely and green.
Great detailing on the many branches, in this one. Here our machinist is just starting to add in the darker colours. Leaves are not all one kind of green, ya know! :-) If you did some circles in brown toward the top of the tree it would look like bird nests.
The trunks above are in two colours of brown. Lighter brown denotes the part that gets the sunlight. Make wispy trunks to denote distance and put these behind the other larger trees in the foreground - if you want a realistic picture that is.
This kind of sewing lends itself to 'naive' folksy type subjects too.
You could 'draw' tree trunks in black and add a little red or brown to denote a forest that has been devastated by fire.
Really love this little tree above. It has a kind of naive charm with its straight trunk and two coloured foliage. This would look charming in a picture for a child's bedroom or fabric book.
Aren't all these samples lovely? Each one is individual and has its own style and look even though we were all copying the same illustration/sewn sample.
We do hope that this will encourage you to try out this lovely technique if you haven't already, and do feel free to pop in to one of our meetings and say Hello.


No comments:
Post a Comment