Saturday, 19 August 2017

An Elephant on Parade

Do you remember this huge Elmer that appeared at the recent Exhibition of work by Lytham St Annes Embroiderers Guild?

He was a stitching activity that visitors could take part in by stitching and decorating one of his coloured squares. At the end of our 2 1/2 day exhibition Elmer was not quite finished, needing a few more squares completing before he had his new suit.
Here are his completed leg sections.
  A completed back leg, above, and front legs, below; with a bit of body :-)


 Now Elmer has had his ear attached, above, and below,  a very colourful and also now decorated - Elmer. How happy he looks.
Someone also penned a sweet little story about Elmer's New Suit, describing how he met a few ladies sat stitching and eating cake (of course!) on a Sewing Day and expressed an interest in having a new embroidered suit made. The ladies being members of the Lytham St Annes Embroiderers Guild rose to the challenge and very soon Elmer was admiring his new reflection in a lake. Was that Fairhaven Lake, I wonder? 
Loving the lake detail as Elmer does seem to jaunt about in the woods quite often and there is usually a lake. It really made me smile. 
How about you? Are you a fan of Elmer too? Come and see him at our meetings in Ansdell. Details on the right side bar.


Elmer now has an ear, below. Bet he is very glad about that...


Elmer in all this colourful glory.

Sunday, 6 August 2017

National Celebration of Stitch 2017 and The Garden Party

Lytham St Annes Embroiderers Guild decided to hold The National Celebration of Stitch Day in the local libraries this year. However, at short notice St Annes Library had to be closed on Saturday so everyone convened at Ansdell Library.
Here are two of our members; Sue Bennet on the left, and our Chairman, Joan Lowe on the right. They are busy stitching Butterflies which was the theme for this year.
No WIPs am afraid as I could not attend but hope to share some completed butterflies in the future. Sue and Joan were joined by other members and the public during the morning session. All had a jolly time whilst raising awareness of our Branch Meetings and the Embroiderers Guild. Well done ladies :-) Read about our National Day of Stitch in 2016 here.
The Celebration of Stitch Day just so happened to coincide with our Garden Party which was favoured with glorious sunshine (unlike last year where it poured down and our party was held in a pretty conservatory. Read the post here). Here we are in the garden which our host had decorated with colourful bunting.
 It was hot! but tea and cakes helped us cope with the heat....
 A yummy strawberry meringue, above, and below, cakes the stitched variety. 

 Just had to snap the Cupcakes embroidered on the table cloth. How lovely.
We were not just munching though - we had some work to do in the form of a crossword, plus raffles, plenty of prizes and a two presentations.
Here are our members, Sue on the left, and Angie, on the right; who received the most Visitor Votes at our recent Exhibition. 
 Both received 9 votes each for an item of work (each had submitted several - they are busy stitchers!) See the Forest Fruits Box that Sue made using the Stumpwork technique here, and Angie's huge Autumn Spice Quilt; which she has since renamed 'Butterfly Paradise' as she says 'it seems much more apt' due to the profusion of butterflies on the fabric blocks and borders.
Lastly, a little more stitchy goodness was on display at the Garden Party with this lovely handkerchief, above. It was stitched for the North West Region Chairman's Challenge which was to stitch a handkerchief that would represent each particular Branch in the region. 
This windmill is a well known local landmark on Lytham Green.
Each kerchief will be joined with the others to make up a cloth that will cover the table at the NW Region AGMs. This was a great idea to make something that everyone could have a part in without the logistics of moving it from branch to branch.
Many thanks to our kind hostess for having us for tea and cakes. Everyone thoroughly enjoyed themselves.


Sunday, 30 July 2017

Machine Embroidery

In this last post documenting the Exhibition of work by the Lytham St Annes Embroiderers Guild, we have a selection of machine embroidery.
This table had a Japanese theme to it (the other half of the table held the display of  Tama bags made from Kimono fabric - read about these here). 
The Kimono wearing ladies on the cushions have been designed on the laptop painstakingly drawing with a mouse and then stitched on a specialist embroidery machine to make these exquisitely decorated soft furnishings below. 

Here are the Japanese Ladies in close up, above and below. 
Notice the traditional footwear.
Our designer went to a lot of trouble to explain the process to make these embroideries on her Brother Super Galaxie 3000 embroidery machine as you can see from the stitched samples and information cards in the first photo of this post.
Whilst the embroidery itself was done in 15 minutes it took 2 hours at the programming, laying and editing stages if you are not using a commercial pattern.
You will need to import an image and make changes, or draw free-hand from scratch using a stylus making sure that all the lines are joined up so that when you select the colour and stitches to fill in there is not a bleed through when it is transferred to the embroidery machine for stitching.
The result is a very professional finish. This was how the bib was made in the previous post.
A twin needle was used to make the square quilting pattern on both cushions.
Love the orange silk Kimono design above!
Below, we have the Oust House. This has been free-machined, which means no patterns or computer programming but you do need concentration and a good eye as well as steady hands and a lot of practise.
Very nice detailing on the brickwork and roof and fabulous floral and green touches growing up the walls of the oust house. See the little attic door in the roof?

Another little door in the trunk of this tree, above. Do fairies or elves live here? Lovely textural stitching make up the grass and greenery.
Below, a beautiful Poppy Bag fit for an evening out.

More free-machining on this interestingly shaped Triangular Bag above, you can just see the beaded flower detail on the Tama bag behind it (see link to see the other Tama bags).
Free-machining on this Nuno Felted bag above, and also free machine quilting on the Owl wall hanging below.
This is Woody, the 'green man' owl. Isn't he lovely? There were a few owls submitted in various stages but Woody was the first quilted and finished (and the best outcome in editing..) To see the other Owls in the making, click herehere and here. The Owls are from a design by Lizzie Wall the Tutor who took the Day School in the links. 


Lastly, we have a couple of free-machine embroidered and embellished book covers. The Terracotta Triangles book cover, above, has couched gold braid that has been free-machine couched using zig-zag and a loose lower tension. Also loving the charms on the ribbon closure.
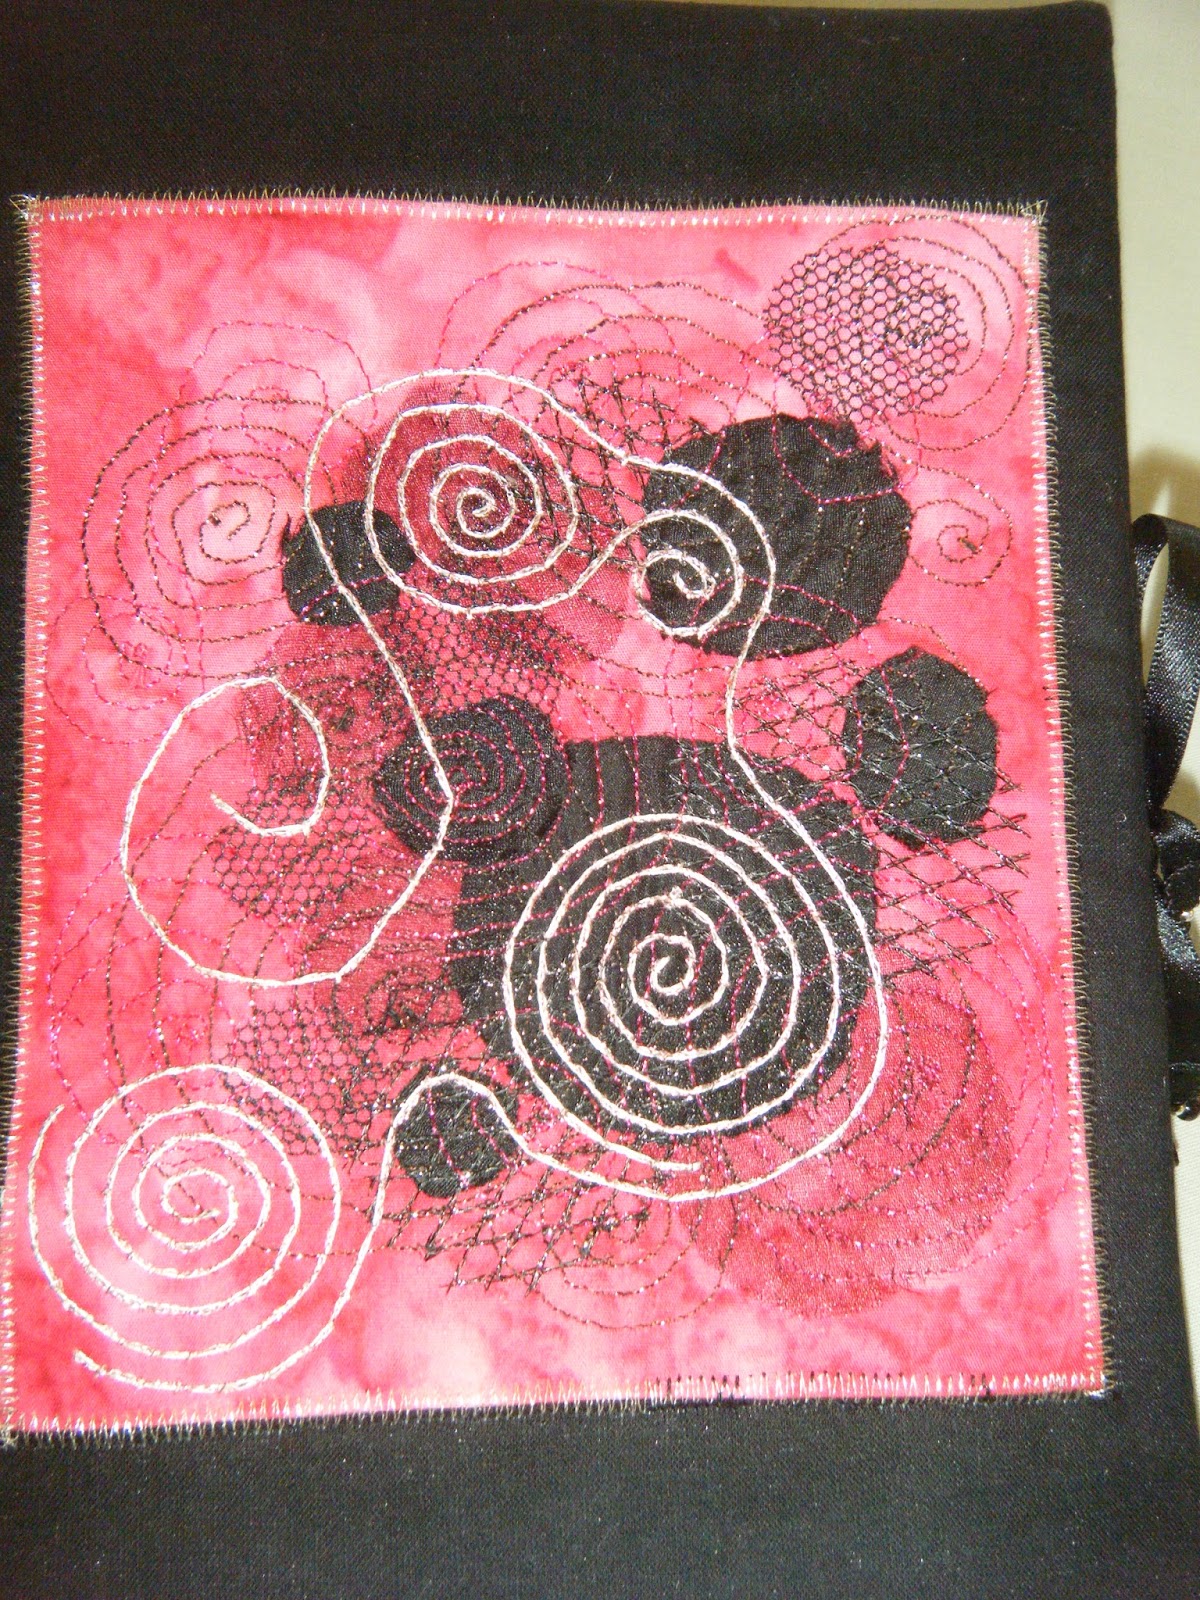
Not sure what the correct colour of the next Spiral Book Cover should be. The reddish pink/coral colour above, or the terracotta below? Both look great but the flash has altered the colour of one. What do you think? Which is your fave?
Whisper - think it may be this one above as the stitching style seems to be that of the maker of the first Terracotta Triangles book cover.

Well, thats all the photos from the Exhibition that came out well enough to post.
We do hope that you enjoyed viewing them. Our stitchers and makers certainly put in a great deal of time and effort not to mention those who gave their time to catalogue, set up, steward, take down, tidy up and all the other jobs and organisation that go into a 3 day Embroidery Exhibition, on top of the making.
Grateful thanks to you all for making everything such a success.

If you can't wait for our next exhibition in 2019 consider coming along to our monthly meetings and join us. You will be very welcome. Address on the right hand sidebar.

Tuesday, 16 May 2017

Quilt Class for Owls

These are the last (but not least) of the Raw Edge Applique Owls made on the Day School by members of the Lytham St Annes Embroiderers Guild Group.
Read previous Posts here and here.
 Lovely Owl with green paisley wings. Notice how the paisley shapes differ in size becoming larger further up the body; and such sweet floral ears. 
Leaves make up the ears  and wings to great effect on the Owl, below. Flowers have been used to create feathery effects at the throat and legs although a little higher up on this owls legs perhaps denoting his or her age and stature.
More fabric pieces awaiting placement on the left.


This is a real Cutie Pie, above, with jade green leaves making lovely wings and a thistle embellishment adding chest decoration. The clam shell fabric mentioned in this post, makes for very good leg feathers or 'fancy pants'. Really sweet.
 This fabulously colourful Owl, above, could have been made by Kaffe Fasset himself - wonderfully bohemian.
Below, our paisley feathered friend touting a fascinator on her head is perched on a branch awaiting her date. Ooh La La...

 Here is another 'Pretty Young Thing' above. Pretty pink elements and the butterflies and large yellow flower make for an adorable lil' owl.
So you see there is no need to stay within the safe confines of what is traditionally 'owl like'. Why not add uniqueness to those feathers with flowers and butterflies and a bit of bling. 
We did not have time to start sewing on the day - everyone was far too busy quietly snipping and cutting and preening feathers. Not much 'tweeting' or 'twittering' went on as everyone was fully immersed and absorbed by the activity. This cutting and sticking thing is very therapeutic :-)
If you would like to have a go yourself contact Lizzie Wall here.
Here is the final line up of all the Owls at the end of the day. A fine flock am sure you will agree :-)
All that is needed now is a piece of backing fabric topped with some wadding an inch or so larger than the top layer with the owl on and then a little quilting.
Lower the feed dogs on your sewing machine and attach a Darning foot (aka a Hopper foot) so that you can free-machine around the various elements of your owl design. Sew closely to each feather or piece in either matching or co-ordinating thread, following the outline of each shape. 
To quilt the background sew lines close together around the body echoing the shape. This lends itself to using a variegated thread colour as there are many colours in the owl itself and a variegated thread prevents having one background colour fighting for attention with your main subject. 
Add bling by using metallic threads or hand sew beads or tiny buttons or sparkly cut out shapes. Can't wait to see the finished results.
Thank you to all our members for allowing photos of their lovely owls and to Lizzie Wall for tutoring us in a very enjoyable workshop.