Sunday, 31 January 2016

2D Stitches


At the January  meeting of the Lytham St Annes Embroiderers Guild we were taught some lovely 2D stitches by our long time member Barbara.
Embroidery stitches have 3 dimensions to them - the first type 1D; are flat across the surface fabric, examples are Black Work and Cross Stitch.
2D stitches look as if they are on top of the surface as if they are raised from the fabric (some people get confused and call these 3D) but 3D embroidery uses a base of wire or felt so that it can stand alone, away from the fabric and is called Stump Work.
This yellow pansy below is an example of stump work. Wire was used to form the shape of the petals and sewn around with Button Hole Stitch then Long and Short stitches used to make the petals which were then cut away from the foundation fabric very close to the button hole stitches.
Absolutely Beautiful Stump Work

Barbara had stitched up so many samples using different types of thread, string and raffia that it will take several posts to show you everything. 
Here she is with a huge frame to show us how to do the first stitch which was Palestrina Stitch also known Double Knot stitch, Tied Coral, Old English Knot stitch or Smyrna Stitch.
When she wears that white apron she means business 

Here she is in action with the Huge Teaching Frame.
A close up of the stitches we were learning - Palestrina, Raised Stem Band, Raised Chain Stitch, Woven Pique, French Knots and Spiders Web.

The Palestrina Knot using Stranded Floss, Pearl Cotton and Polypropylene String.

On the left in green a good example of Palestrina in a wool type thread. On the right it would have been better to use more than 2 strands of floss. Obviously a thicker thread will require a needle with a larger eye such as a Long Darning Needle but it must have a sharp pointed end not a blunt one as on a wool darning needle.
In the next post you'll see what Barbara did with these stitches and how they can be used in your embroidery.


Till then - Happy Stitching...


Tuesday, 21 April 2015

More Lichen Loveliness


As promised here is a selection of the Lichens we created on our Saturday Workshop in February with the talented and very friendly teacher, Sandra Kendall.

I cant remember who did what but I will say that there was not one single piece that didn't look both gorgeous and fantastically real.


A rhapsody in blue. I admired how this really stood up off the fabric even before embellishing. 
.


Below is the start of a lichen on brown felt using cream and beige wools. I think this colour way will look lovely once its finished.


Pretty lilac and pink wool.


Beads added to an orange centre. Love the purples around the edge.


Two more in corals.


I think you'll agree that a lot of fun can be had with some curly wool or fibre, a few simple stitches and beads. There is definitely a lot more to Lichen and Encrustations than at first is apparent. 


 As always Happy Stitching. 

Monday, 20 April 2015

Lichens and Encrustations

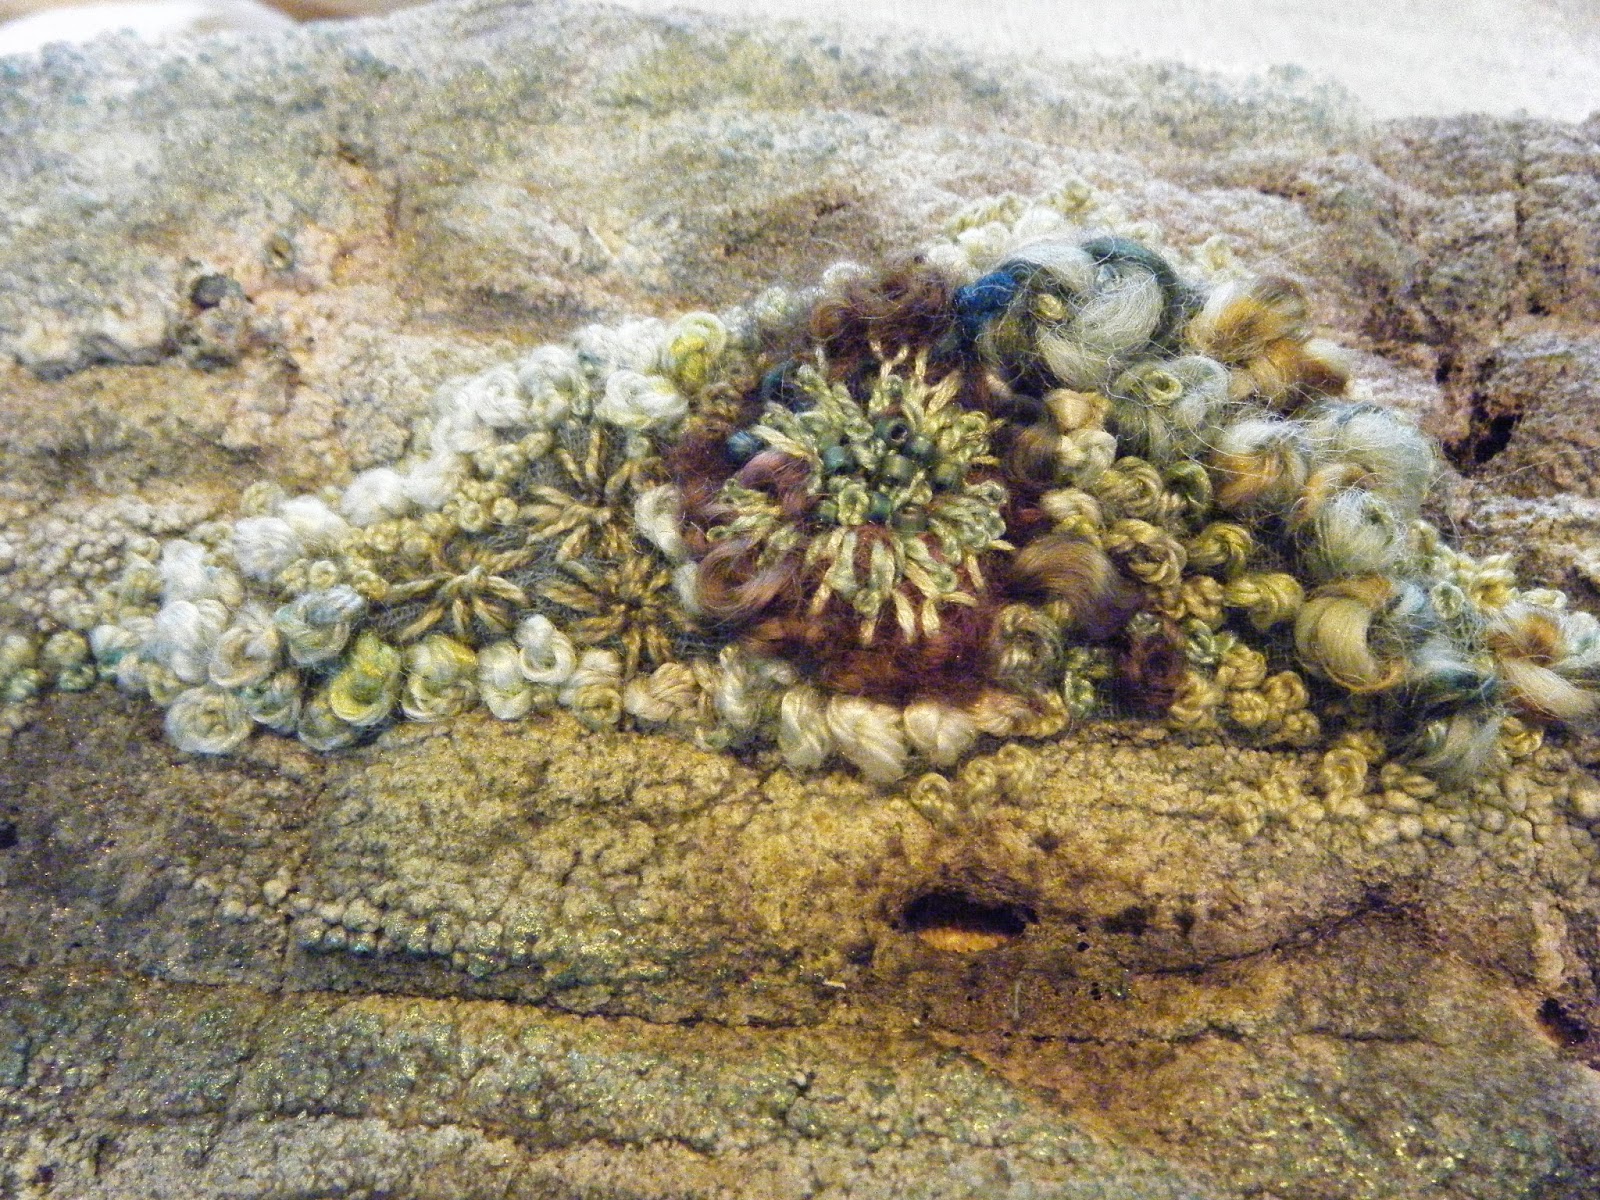
Who knew those things that grow on rocks and walls were so very beautiful? We all normally just ignore them or see them as a mess on our patios or stone planters, but they are in fact complex organisms/plants.

February we had a Day School and Sandra Kendall came all the way from Cumbria to show us how to stitch Lichens and Encrustations. Take a look at a few of her many gorgeous pieces.

 This was a single Lichen for the beginners to start with. Curly wool fibres were laid onto our hooped up fabric - some people had pre-painted theirs to look like rock - and secured with stab stitch. I know now why its called stab.... ouch!!

Fly stitch, pistil stitch, bullions and French knots were used to decorate. Beads were also used to great effect by those people who were clever enough to manage to thread their beading needle..... I only manage threading mine by putting it under my magnifier and then its tricky as I don't have any of that special Beading Thread and just used ordinary floss....

Right and Below examples of sewn Lichen on felt pebbles.

They are so life like :-)

A grey/green version.


I love the way the green background really brings out the details of the stitched Encrustations and shows off the thread colour.

This piece has curtain rings covered in Button Hole stitch and more advanced embroiderers could use Raised Cup stitch, Buttonhole Wheels and flowers or Woven Spider Web Circles.


Monogram Magic left.

On Wood.


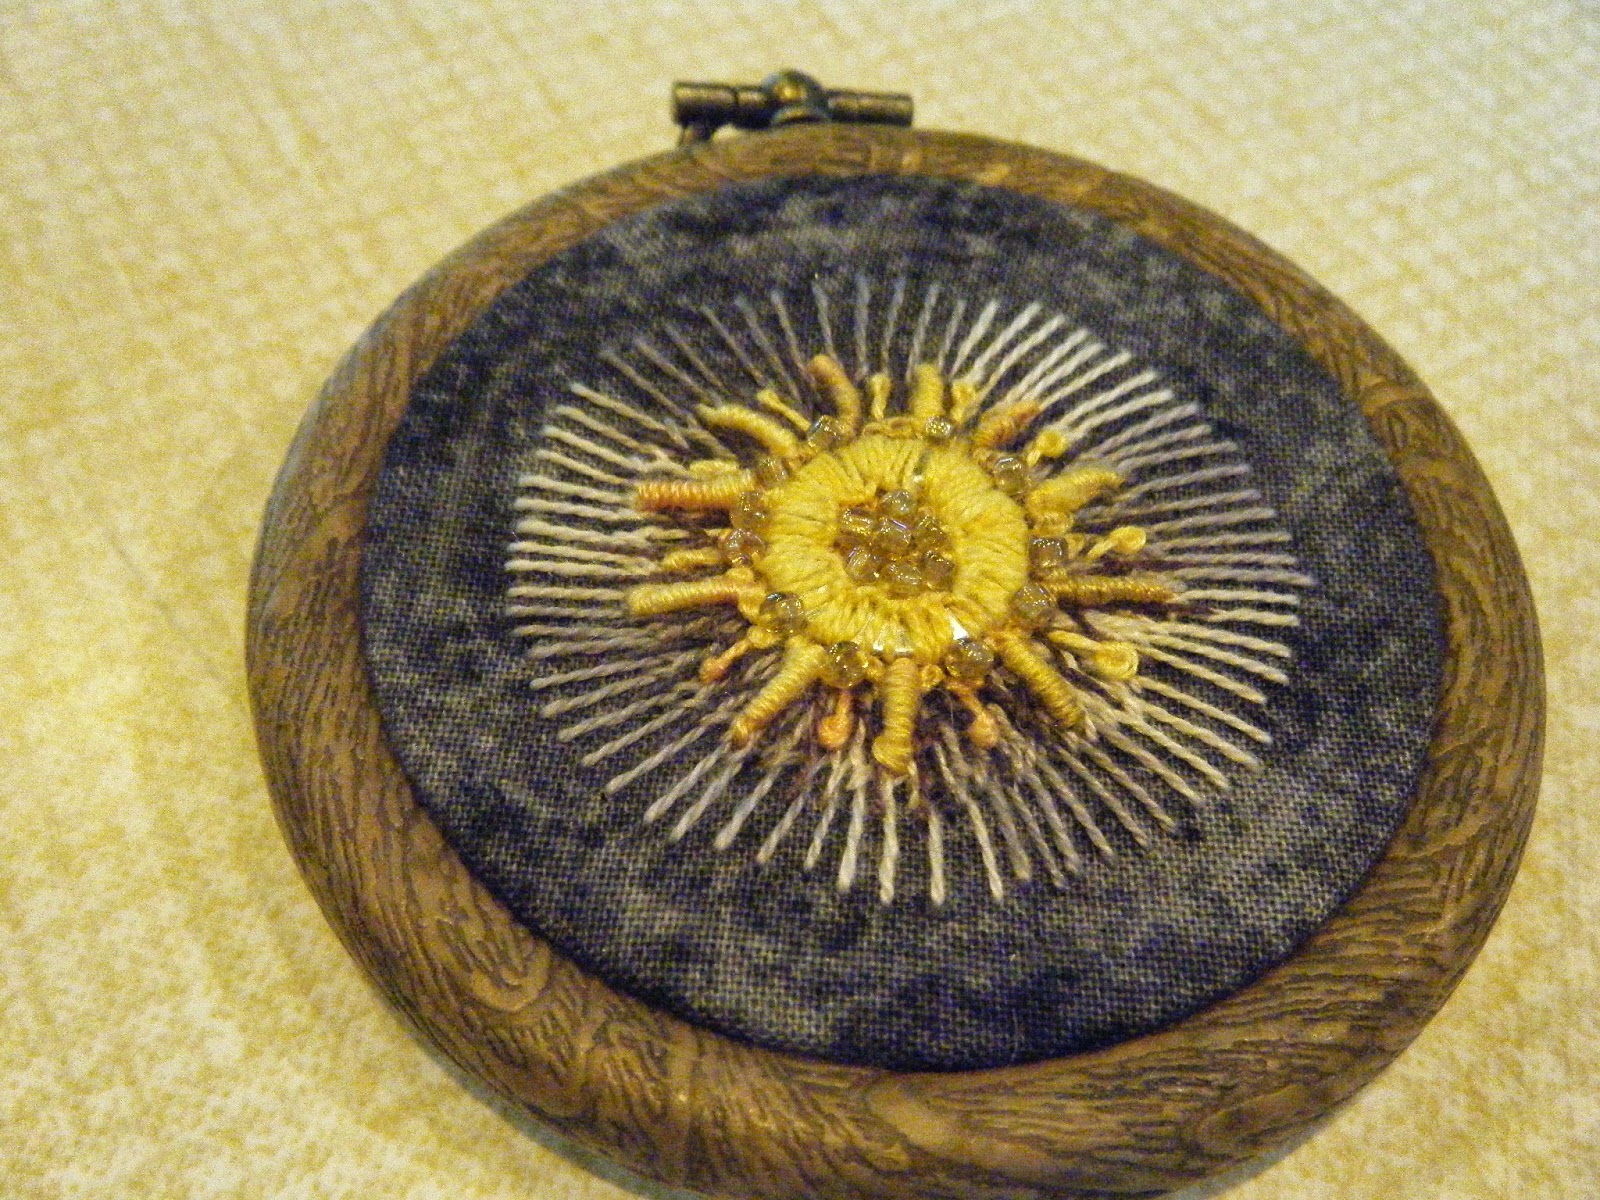
Another piece using bright yellows and a piece of wood to great effect.


Right - a small piece in framed by a hoop.


This looks like a very large piece of bark but it is in fact fabric.

It was a very enjoyable day and not as hard to get good results as I had previously imagined.

As this post is rather long I will show you pics of the groups efforts in the next post.

Till then Happy Stitching .

Brazilian Bliss


Welcome to our very first post - its exciting to finally have our own blog.  As we are now well into April, I thought it would be nice to give you a little peek at the things we have been doing so far this year.
Why Brazilian Bliss? Our first workshop of the year in January was Brazilian Work with our very talented Sue Bennet.
Having never heard of Brazilian work before I was intrigued and looking forward to our meeting. This kind of embroidery seems to have taken its name from the very bright colours that we associate with Brazil.
Take a look at two samples of Sue's work.


The main stems are in Stem Stitch with background foliage in Couching with French Knots for the tiny yellow flowers.

Leaves in Satin Stitch and flower centres are French Knots. Flower petals could be either Bullion Stitch as shown opposite in Sue's lovely piece ( forgive the reflections and my shadow - its difficult to photograph framed work behind glass in the evening with overhead lighting).

Or the easier Pistil Stitch or a medium level Bullion Lazy Daisy Stitch (sorry I couldn't get a clear photo of the latter).

Sue had made things much easier for us by providing us with fabric ready marked out with the design and a worksheet showing diagrams of all the stitches. She does work very hard making sure we can get down to stitching as soon as possible without wasting time on preparation.


This is Sue's sample in Pistil Stitch using variegated peach/pink threads to great effect.

We all started with the stems and leaves.  The background foliage was next and I really enjoyed couching the thread for the stems as it grew very fast. This was in one strand only, all other stitches used the normal 2 strands of floss.

The whole thing was very fast to stitch so everyone enjoyed it immensely. We started at the meeting on Wednesday and by Friday afternoon mine was finished. I think sometimes it is refreshing to start and finish a small piece quickly instead of it taking forever and ending up being a UFO and being added to the 'Guilt List'.
Here is my example below using Bullion Bullion Stitch. This was the last bit to stitch and I had to stick a circle of iron on Vilene behind my main flower as holes were beginning to appear in my fabric and it was in danger of disintegrating! 

Don't laugh at my leaves.......

That's all for now...... Happy Stitching!